How to Capture a Compliant Biometric Passport Size Photo for Infants at Home
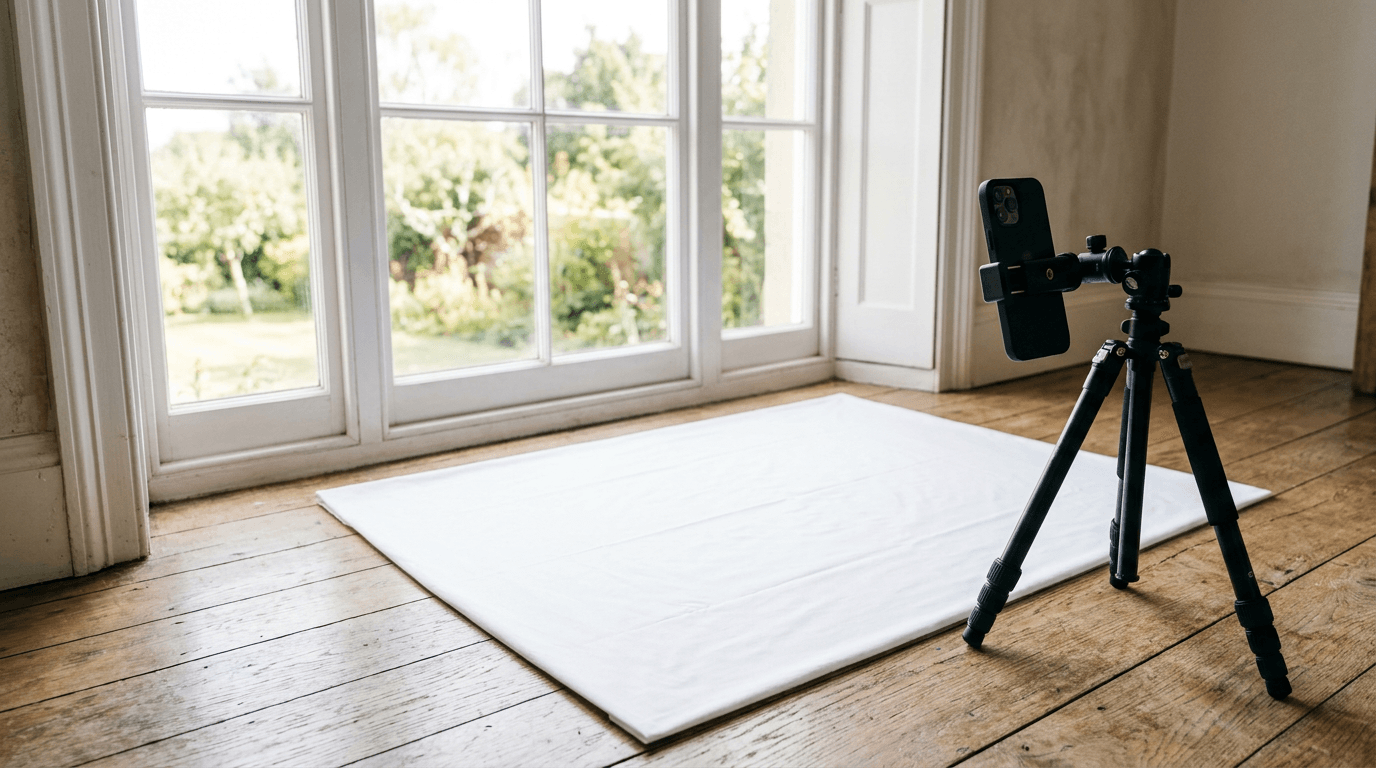
Standing over a squirming infant lying on a white sheet, trying to capture a passport size photo while keeping your own shadow out of the frame, is a uniquely frustrating challenge. Most parents assume the hardest part is getting the child to look at the lens. In reality, government biometric systems reject files primarily for uneven illumination, incorrect focal distance, and inaccurate head-to-canvas proportions. Achieving compliance without specialized studio equipment requires understanding exactly what the automated screening software measures before a human clerk ever sees the application. This guide breaks down the physical setup and digital formatting required to generate a globally compliant biometric image at home.
Quick Summary
Capturing a compliant biometric infant image at home requires flat, diffused lighting, a textureless background, and precise head positioning to satisfy automated government scanners. Understanding the geometric requirements allows you to bypass studio visits and format a standard smartphone capture into strict, print-ready dimensions.
- Use indirect window light to prevent asymmetrical facial shadows.
- Position the infant flat on their back to eliminate visible supporting hands.
- Step back and use an optical zoom to prevent wide-angle lens distortion.
- Process the raw image through compliance software for exact biometric cropping.
Table of Contents
- 1. Environment and lighting setup
- 2. The physical background layer
- 3. Smartphone focal length and distortion
- 4. Infant positioning and support
- 5. Timing the biometric expression
- 6. Digital formatting and compliance
- 7. File export and printing specs
- Common Pitfalls & Troubleshooting
- FAQ
- Recommended Reads
1. Environment and lighting setup
Asymmetrical shadows trigger automatic geometry failures
The absolute baseline for biometric acceptance is flat, even lighting across the subject's face. Facial recognition algorithms operate by mapping the nodal points of the face - specifically measuring the distance between the pupils, the tip of the nose, and the edges of the jawline. The mistake people actually make here is relying on overhead room lighting or a direct smartphone flash. A single ceiling light creates sharp, dark valleys under the chin and deep inside the eye sockets, which the software interprets as physical obstructions.
Instead, the environment must rely entirely on a large, diffused light source. Set up near a large window during daylight hours, ensuring the light washes evenly across the infant's entire face rather than striking only one cheek. If one side of the face is heavily shadowed, the scanner cannot accurately locate the jawline boundary. Turn off all artificial room lights during capture; mixed color temperatures confuse the camera's auto-white-balance, often resulting in rejected skin tones. When dealing with strict municipal rules, checking a Germany Baby Passport Photo Guide ensures you understand just how rigidly these lighting parameters are enforced.
Practical rule: If you can see the shadow of the infant's nose extending outward past their nostril, the light is too directional and will likely fail biometric screening.
2. The physical background layer

Fabric wrinkles mimic facial structures to scanners
A biometric photo requires total separation between the subject and the background. The standard instruction is to lay the infant on a white or light-colored sheet, but the frequent failure mode is using a sheet that is heavily creased or loosely gathered. Automated extraction tools scan for continuous pixel values to erase the background. Deep wrinkles cast shadows that read as dark lines, which the algorithm often confuses with stray hair or clothing, resulting in a jagged, rejected crop.
The physical surface beneath the sheet must be firm - like a carpeted floor or a tight mattress - so the fabric can be pulled completely taut. Additionally, you must engineer high contrast between the child and the background. If a baby wears a pale gray or pure white shirt against a white sheet, the software loses the boundary of the shoulders. Dress the infant in a dark or deeply saturated color (such as navy blue or dark red) so the shoulders form a sharp, unmistakable line against the background fabric.
3. Smartphone focal length and distortion
Wide-angle default lenses warp the facial center
Modern smartphones default to wide-angle lenses (usually equivalent to a 24mm or 28mm field of view). When you hold a wide-angle lens close to a subject's face to fill the frame, it induces severe barrel distortion. This optical effect artificially enlarges the nose and pushes the ears further back along the sides of the head. Because biometric systems verify identity based on flattened, geometric facial proportions, wide-angle distortion is a guaranteed pathway to rejection.
The mechanical fix is to increase the physical distance between the camera and the subject. Step back at least 1.5 meters from the infant and use the smartphone's optical zoom (the dedicated 2x or 3x lens option, never the pinch-to-zoom digital magnification) to re-frame the shot. The optical telephoto lens compresses the focal plane, rendering the face in its true, flat proportions exactly as a dedicated passport booth camera would.
4. Infant positioning and support
The flat lay approach eliminates rejected support hands
A standard adult passport photo requires the subject to sit upright, facing the camera directly. When capturing a newborn passport photo, attempting to hold the child upright introduces a cascade of compliance failures. A parent's fingers inevitably encroach on the subject's shoulders, the infant's clothing wrinkles heavily across the neck, and the child's head wobbles, ruining the focal distance.
The requirement is complete separation between the subject and any supporting human elements. Laying the infant flat on their back on the floor is the only reliable method to achieve this. The common mistake during the flat lay is the parent leaning directly over the child, blocking the window light and casting a massive silhouette over the background. To prevent this, shoot from a slight angle positioned directly above the crown of the infant's head, using the optical zoom discussed earlier to bridge the distance. Ensure the infant's spine is perfectly straight; if the body is curved, one shoulder will sit higher than the other, causing a rejected tilt in the final image.
5. Timing the biometric expression
Mid-movement captures invalidate facial measurements
Biometric screening requires a neutral expression to accurately measure the geometric relationship between the eyes, nose, and mouth. The mistake parents make is triggering the shutter while trying to coax a smile, or shooting while the infant is yawning, crying, or sucking on a pacifier. Any distortion of the jawline muscles or narrowing of the eyelids changes the core biometric map. For infants under twelve months, border agencies slightly relax the "neutral expression" definition - a slightly open mouth is usually passed - but both eyes must be visibly open and looking straight toward the lens.
Mechanically, you are fighting the infant's natural reflexes. Waving toys to the left or right of the camera causes the head to turn off-axis, breaking the required full-frontal alignment. Instead, hold a high-contrast black-and-white object immediately flush with the camera lens. Use the camera's burst mode rather than attempting single shots. You only need the split-second gap where the facial muscles relax, the shoulders remain square, and the head stops rolling to the side.
6. Digital formatting and compliance
Manual cropping fails strict head-proportion mandates
A well-lit, perfectly positioned raw photograph is merely the starting material; it still must be formatted to exact dimensional specifications. Every government mandates a specific head-to-image ratio. The passport photo requirements for most European documents dictate that the head must occupy exactly 70 to 80 percent of the total image height within a 35x45 mm frame. The fatal mistake here is attempting to crop the image manually using standard smartphone bounding boxes.
When an untrained user manually crops a photo, they frequently scale the head too small or place the eyeline too high above the vertical center. To verify global rules, reviewing EU & International Baby Passport Photo Requirements & Guides prevents sizing errors before submission. Specialized biometric processors exist strictly to handle this math. Using a dedicated EU Baby Passport Photo Maker removes the manual risk by automatically isolating the subject, stripping away the physical background sheet, and scaling the head to millimeter-perfect proportions mandated by the selected country.
7. File export and printing specs
Messenger app compression destroys mandatory pixel density
After the image is mathematically cropped, the delivery mechanism dictates the final technical specifications. A digital visa gateway requires specific file sizes (often under 240 kilobytes) and specific pixel dimensions. Conversely, a physical passport application requires a dense, uncompressed 300 DPI (dots per inch) print file. The error applicants consistently make is transferring the finished file to a secondary device via a messaging app like WhatsApp or iMessage. These apps aggressively compress images, stripping the EXIF data and introducing digital artifacts that instantly fail high-resolution registry scanners.
To capture a compliant passport photo Berlin residents must, for instance, submit high-resolution physical prints cut exactly to 35x45 mm on glossy photographic paper. Standard matte office paper is instantly disqualified. The safest workflow is generating a 4x6 inch digital collage containing multiple copies of the compliant photo. Transfer this collage via email at its "Original Size" or through cloud storage, then print it directly at a local pharmacy kiosk to ensure the scale remains completely untouched.
Common Pitfalls & Troubleshooting
The Floating Head Extraction
- Symptom: The infant's hair or ears appear jagged, or the background removal tool has erased portions of the shoulders.
- Cause: Insufficient contrast between the child's clothing, their hair color, and the physical background sheet beneath them.
- Fix: Dress the infant in deeply colored clothing that contrasts sharply with the white or light gray sheet. Reshoot the image so the processing software can cleanly detect the outer boundaries of the subject.
The Retina Glare and Red-Eye Rejection
- Symptom: The child's pupils appear white or red, or there is a harsh, blown-out white spot on the forehead.
- Cause: The smartphone flash fired during capture, reflecting directly off the retina and the natural oils in the skin.
- Fix: Disable the camera flash entirely in your settings. Move the physical setup closer to a diffused natural light source. Flash glare is the single most frequent cause of automated registry rejection.
The Asymmetrical Shoulder Slump
- Symptom: One shoulder is visibly higher than the other in the final crop, causing the head to appear unnaturally tilted.
- Cause: The infant was positioned on an uneven blanket, or the parent held the camera at a slanted angle rather than perfectly parallel to the floor.
- Fix: During the flat lay, gently adjust the hips and shoulders so the spine is straight. Use the smartphone camera's internal leveling grid to ensure the lens is perfectly flat and parallel to the infant's chest before capturing.
The Split-Face Shadow
- Symptom: One ear and cheek are fully illuminated while the opposite side of the face is lost in deep shadow.
- Cause: Positioning the subject with a bright window directly to their left or right side, rather than allowing the light to wash over them evenly from the top down.
- Fix: Rotate the baby 90 degrees so the window light comes from the top of their head, or place a large piece of white cardboard on the shadowed side to bounce ambient light back onto the dark cheek.
FAQ
Do both of the infant's ears need to be visible? Yes, whenever physically possible. While some registries offer slight leniency for newborns if the head is perfectly straight, hair or clothing obscuring the ears can trigger a failure in the facial width measurement. Gently brush hair behind the ears before shooting.
Can the infant wear a headband or have a pacifier in the photo? No. Any accessory that breaks the silhouette of the head or covers the mouth will immediately disqualify the image. Remove all pacifiers, large bows, hats, and teething toys. Head coverings worn strictly for religious purposes are the only exception, and they still must not cast any shadows on the face.
What if the infant's mouth is slightly open? Most international border agencies accept a slightly relaxed, open mouth for infants under one year old, provided there is no pacifier present and both eyes are fully open, looking squarely at the camera lens.
Does the physical background sheet need to be perfectly white? Depending on the specific country's rules, either plain white or light gray is required. However, the background must be entirely free of woven patterns, deep shadows, or secondary objects. AI tools will replace the physical sheet with a pure digital background, but starting with a clean, light surface ensures the extraction works properly.