How to Capture and Format a Compliant Passport Size Photo
The official slides the application across the desk, pointing to a faint shadow behind the left ear. That microscopic gradient is enough to trigger a rejection because modern facial recognition software cannot map the jawline against it. Capturing a compliant passport size photo at home is not a photography exercise; it is the process of generating a clean data set for a biometric algorithm. The camera must document the exact mathematical distances between the pupils, the nose, and the chin. When you understand what the automated systems look for, you can bypass the studio and capture a file that passes government checks on the first attempt.
Quick Summary
A compliant identification image requires flat lighting, neutral expressions, and strict adherence to millimeter-specific cropping rules. The automated systems checking these files evaluate background separation, lens distortion, and contrast levels before a human ever sees the application.
- Diffuse all light sources to eliminate drop shadows behind the subject.
- Step back and use a telephoto lens setting to prevent facial distortion.
- Lock the subject's focus on the lens with a completely neutral mouth and open eyes.
- Crop precisely to the chin-to-crown ratios mandated by the issuing country.
- Export the final file at 300 DPI without applying heavy JPEG compression.
Table of Contents
- 1. Lighting the Passport Size Photo Environment
- 2. Positioning the Camera
- 3. Managing Posture
- 4. Formatting the Dimensions
- 5. Preparing the Digital File
- Common Pitfalls & Troubleshooting
- FAQ
- Recommended Reads
1. Lighting the Passport Size Photo Environment
Why Mixed Lighting Fails the Biometric Check
Automated scanners separate the subject from the background by reading contrast. If the background is darker on the left side than the right, the algorithm registers that gradient as a physical object rather than empty space. Achieving the necessary flat, uniform light requires controlling both the direction and the color temperature of your light sources.
The most frequent error is relying on overhead room lighting. Tungsten ceiling bulbs cast hard shadows under the brow bone, the nose, and the chin. This alters the perceived depth of the eye sockets, causing the facial mapping software to miscalculate the subject's bone structure. Furthermore, mixing a blue daylight window with a yellow indoor lamp confuses the camera's white balance. The sensor splits the difference, rendering one side of the face orange and the other blue. This unnatural skin tone triggers a manual review and almost guarantees a rejection.
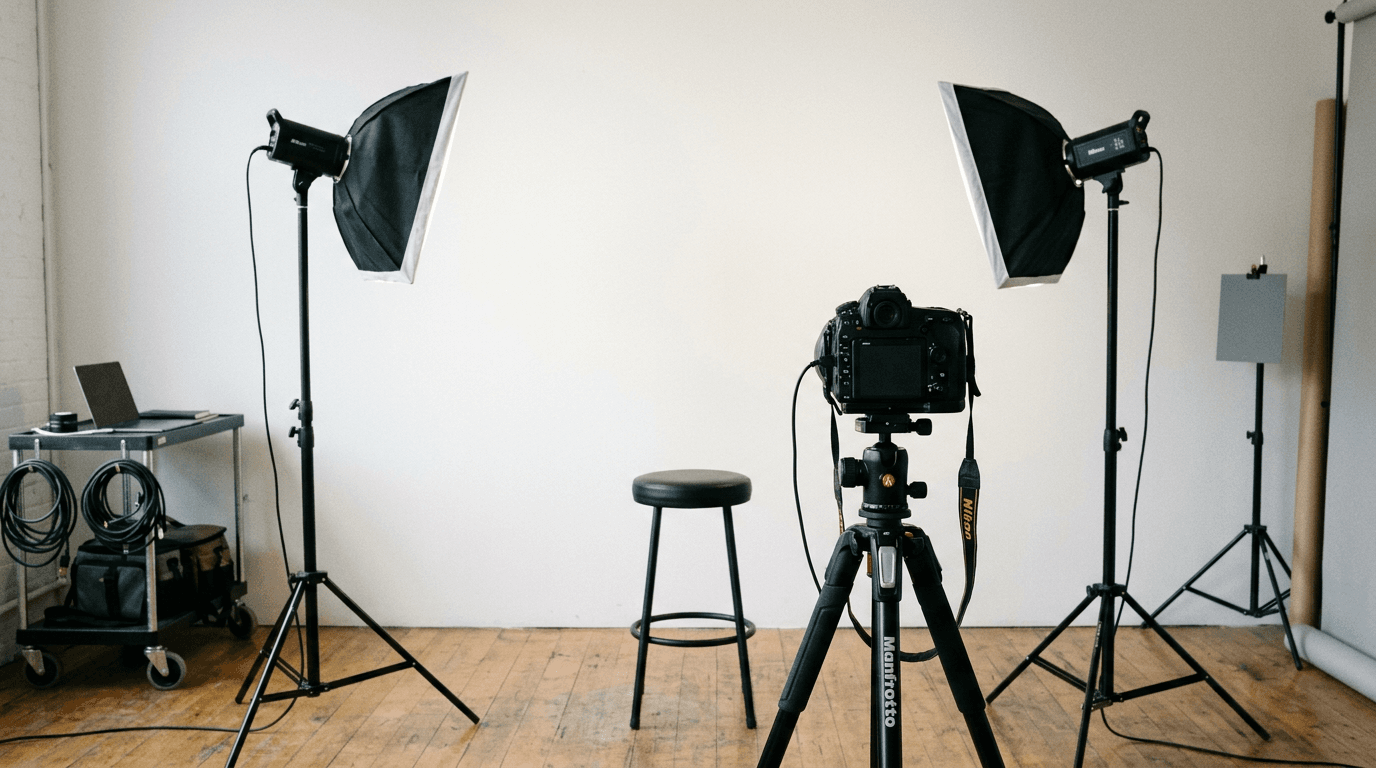
To light the environment correctly, position the subject facing a large window on an overcast day. Overcast skies act as a massive diffuser, wrapping soft light evenly around the face. If you must use artificial light, place two identical lamps at 45-degree angles in front of the subject to cancel out each other's shadows. Finally, ensure the subject stands at least 1.5 feet away from the wall; standing flush against the backdrop creates a sharp drop shadow behind the shoulders that ruins the background separation.
2. Positioning the Camera

How Lens Distortion Alters Facial Geometry
Smartphone primary cameras utilize wide-angle lenses, typically equivalent to a 24mm or 28mm focal length. While excellent for capturing landscapes, wide-angle lenses introduce severe barrel distortion when placed close to a subject. Shooting a portrait from 12 inches away stretches the center of the image, making the nose appear bulbous, while compressing the edges, pushing the ears backward. Biometric algorithms measure the exact distance between the eyes and the ears; barrel distortion fails this geometric check instantly.
Practical rule: Never hold the camera closer than four feet from the subject's face, regardless of how small they appear on the screen; you will crop the empty space out later.
To capture accurate facial proportions, you must physically step back to a distance of 4 to 5 feet (1.2 to 1.5 meters). From this distance, use the smartphone's optical telephoto lens (usually marked as 2x or 3x zoom) to frame the subject. This focal length compresses the background and flattens the facial features into their true, undistorted geometric proportions.
Camera height is equally critical. The lens must sit exactly at the subject's eye level. Shooting from a lower angle makes the jawline appear artificially wide and exposes the nostrils, while shooting from above exaggerates the size of the forehead. Both angles alter the Z-axis alignment of the face, causing the template mapping to fail.
3. Managing Posture
The Mechanics of a Neutral Biometric Expression
A neutral expression is a strict requirement because human faces change shape dramatically during emotional responses. Smiling elevates the cheekbones, narrows the visible area of the eyes, and alters the width of the mouth. The biometric algorithm requires the baseline resting face to create an accurate template.
The subject must keep their mouth entirely closed, with no teeth visible, and their eyes fully open and focused directly down the barrel of the lens. Glasses must be removed entirely. Even clear lenses with anti-reflective coatings bounce microscopic light flares that obscure the orbital bone, and thick frames disrupt the algorithm's ability to map the depth of the eye sockets. Hair must be tucked behind the ears, and bangs cannot touch the top of the eyebrows.
For infants, managing posture introduces mechanical difficulties. Because newborns cannot sit unassisted, a parent's instinct is to hold them. However, a supporting hand entering the frame triggers an automatic rejection. The mechanical solution is to lay the infant flat on their back on a wrinkle-free white sheet, shooting straight down from above. When formatting an image according to the New Zealand Baby Passport Photo Guide, the tolerances for slight infant head tilt are somewhat more forgiving than for adults, but the camera sensor must still remain perfectly parallel to the floor to avoid vertical distortion.
4. Formatting the Dimensions
Where Millimeter Cropping Rules Break Applications
Capturing the raw file is only the first phase; cropping it to the exact passport size photo dimensions dictates whether the application passes. Different governments use entirely different spatial templates, and applying the wrong ratio ruins the submission.
The standard European and Schengen zone format requires a 35 × 45 mm image. However, simply cutting the paper to this size is insufficient. The biometric photo size regulations mandate that the head itself - measured strictly from the bottom of the chin to the crown of the head, excluding hair volume - must occupy between 32 mm and 36 mm of that vertical space. This leaves a minuscule margin for the background above the head and the shoulders below. If the head measures 38 mm, the software flags the image as zoomed in. Consulting the Germany Baby Passport Photo Guide reveals just how strictly this chin-to-crown ratio is enforced by federal printing offices.
Other jurisdictions abandon the 35 × 45 mm standard entirely. A passport format photo for the Middle East or North America often relies on square cropping. As detailed in the Saudi Arabia Baby Passport Photo Guide, the requirement shifts to a 51 × 51 mm (2.0 × 2.0 inch) square. This drastically changes the composition, requiring much more of the torso to remain visible in the frame to maintain the correct head proportion within the wider aspect ratio.
5. Preparing the Digital File
How Compression Artifacts Ruin Digital Submissions
Digital applications introduce a distinct layer of technical failure points. Even if the physical crop is flawless, the passport image size measured in pixels and megabytes can cause an immediate portal rejection.
Government upload portals strictly cap file weight to manage server loads. A modern smartphone produces a 12-megabyte raw image, which no consulate portal will accept. You must compress the file, but doing so aggressively introduces JPEG artifacts. These are blocky, pixelated squares that form around high-contrast edges, such as the jawline against a white background. When the biometric scanner encounters these artifacts, it interprets them as physical jagged edges on the face, failing the contour check.
To maintain visual fidelity while reducing the passport picture size, export the image at exactly 300 DPI (dots per inch). This resolution provides the exact pixel density required by facial recognition software without artificially bloating the file size. For instance, the Singapore Baby Passport Photo Guide outlines specific digital upload caps, requiring the final JPEG to sit under 240 KB while strictly maintaining a 400 by 514 pixel dimension. Always resize the physical pixel dimensions first, and then apply only light JPEG compression, rather than applying heavy compression to a massive, unresized file.
Common Pitfalls & Troubleshooting
Identifying why a photo looks wrong requires diagnosing specific visual symptoms. The following failures look similar to the untrained eye but require entirely different mechanical fixes.
The Gradient Background
- Symptom: The background appears pure white on the left side but fades to a muddy grey on the right side.
- Fix: The subject is blocking the ambient light source. Turn the subject's body so they directly face the primary light source (such as the window), allowing the light to travel past them and fall evenly across the wall behind them.
The Floating Head
- Symptom: The final crop shows only the subject's neck and head, with absolutely no shoulders visible at the bottom of the frame.
- Fix: The initial framing was too tight. You must leave at least an inch of visible shoulder width to define the torso's alignment for the biometric scanner. Recrop the original raw file, zooming out until the collarbone is clearly anchored in the bottom fifth of the frame.
Altered Skin Textures
- Symptom: The skin looks unnaturally smooth, plastic, or entirely lacks visible pores and texture.
- Fix: The smartphone's native camera application applied an automatic "beauty filter" or aggressive noise reduction. You must dig into the camera settings and disable all portrait modes, beauty enhancements, and artificial background blurring features before taking the shot. The camera must capture raw, unedited skin texture.
Red-Eye Reduction Glare
- Symptom: Tiny, sharp white dots appear directly over the center of the pupils, obscuring the iris.
- Fix: The camera's flash fired directly into the retina, reflecting off the moisture. Turn off the flash entirely. Rely solely on ambient room lighting or natural daylight to prevent direct reflections on the eye.
FAQ
What is the standard size for these documents?
There is no single global standard. A dimension of 35 × 45 mm is standard across Europe and the Schengen zone, while 51 × 51 mm (2 × 2 inches) is standard in the United States and Saudi Arabia. Always verify the exact millimeter requirements with the specific issuing authority before cropping.
Can the subject wear prescription glasses?
Most jurisdictions now strictly forbid glasses of any kind. Even clear lenses create micro-reflections that obscure the orbital bone, and thick frames disrupt the biometric mapping of the eye sockets. You must remove them entirely for the photograph.
How do I keep a newborn's eyes open for the shot?
Timing is the only reliable mechanism. Attempt the capture immediately after a nap and a feeding, when the infant is naturally alert and content. Do not use a camera flash to startle them awake, as this causes immediate squinting and ruins the resting facial geometry.
Are subtle smiles permitted?
No. A smile, even a subtle one, alters the resting geometry of the face by elevating the cheeks and narrowing the eyes. The mouth must remain completely closed with a relaxed, neutral expression to pass the automated biometric template checks.