How to Determine Exact Passport Size Photo Dimensions and Framing
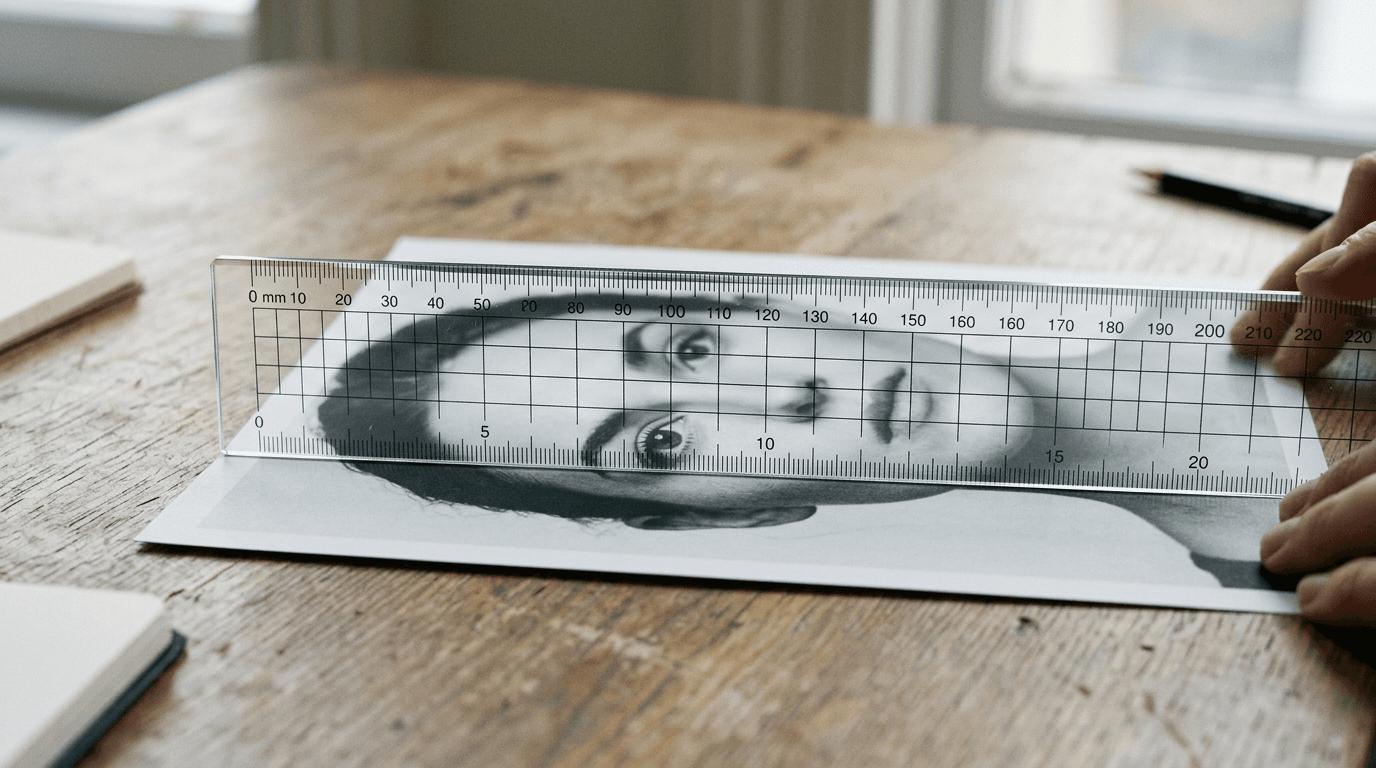
Most passport applications stall not because of missing documents, but because an applicant submits a picture where the subject's head measures 25 millimeters instead of the mandated 32 millimeters. Biometric scanners at embassies do not evaluate how clear or centered an image looks to the human eye; they measure distinct geometric anchor points on a strict pixel grid. If the distance from the chin to the crown of the head falls outside a tight 4-millimeter tolerance, the file is automatically flagged and the application is rejected. Understanding the exact passport size photo dimensions required by your destination country is the only way to prevent a minor cropping error from delaying a critical travel document or visa by weeks.
Quick Summary
Getting a biometric document approved means matching both the outer physical print dimensions and the internal facial scaling to a specific government's baseline standard. A compliant image relies on strict aspect ratios, resolution density, and specific chin-to-crown measurements rather than simple visual framing.
- Always check the destination country's exact millimeter requirements before framing the shot.
- The head must usually occupy the vast majority of the total vertical space.
- Digital file submissions require specific pixel configurations and a minimum of 300 DPI.
- Backgrounds must be entirely uniform, shadow-free, and meet high contrast thresholds.
Table of Contents
- 1. Determine Your Specific Passport Size Photo Dimensions
- 2. Calculate the Internal Head-to-Image Ratio
- 3. Position the Camera for Biometric Alignment
- 4. Set the Correct Resolution for Print and Digital Files
- 5. Account for Minimum Margins and Bleed Areas
- 6. Manage Background Contrast and Lighting Density
- 7. Account for Posture and Spinal Axis Alignment
- Common Pitfalls and Troubleshooting
- FAQ
- Recommended Reads
1. Determine Your Specific Passport Size Photo Dimensions
A common mistake applicants make is assuming a universal global standard exists for all travel documents. It does not. The European Union utilizes the Schengen standard of 35x45 millimeters, while the United States strictly requires a 2x2 inch (51x51 millimeters) square. If you print a Schengen-compliant image and attempt to submit it for an American application, the embassy will reject it immediately because the physical aspect ratio is completely incompatible with their system.

The mechanism behind this rejection is the physical scanning template used by border agencies. Immigration software is calibrated to search for facial landmarks within a very specific coordinate grid based entirely on the outer boundaries of the printed image. When you use the wrong starting borders, the software maps the face coordinates incorrectly, failing to read the biometric markers. For instance, referencing a specific Germany baby passport photo guide ensures you use the strict 35x45 millimeter layout required in that jurisdiction, avoiding automated rejections.
Before you position your subject or set up a camera, look up the exact regulations for the country issuing the document. Do not rely on generic camera application presets that simply label a crop box "passport". Check the official consulate guidelines to confirm whether you need a rectangular or square layout. A quick check you can do today is to measure a previously accepted document from that same country with a physical ruler; if the width is exactly 35 millimeters and the height is 45 millimeters, you must configure your camera and crop tool for the standard European layout.
2. Calculate the Internal Head-to-Image Ratio
Getting the outer borders correct is only half the process. The more critical standard is the internal framing, commonly referred to as the head-to-image ratio. Every biometric passport size photo demands that the distance from the bottom of the chin to the physical top of the head (specifically excluding hair volume) occupies a fixed percentage of the total vertical space.
For most rectangular documents, the head must measure between 32 and 36 millimeters from the point of the chin to the crown, situated within a 45-millimeter total height. This means the face takes up roughly 70 to 80 percent of the frame. If the head is too small, the biometric scanners cannot accurately resolve the distance between the pupils. If the head is too large, the facial recognition software lacks the necessary physical context of the jawline, neck, and upper shoulders required to verify posture. Comparing this against a United States baby passport photo guide reveals that while the outer shape changes to a square, the internal head height must still hit a specific 1 to 1.375 inch window.
The mistake most people make is cropping the image by eye, relying on what looks like a standard portrait layout. This invariably leads to a head size that is either too zoomed in or too far away to map correctly.
Practical rule: Always measure the chin-to-crown distance on a digital draft using a millimeter grid overlay before committing to a final print.
You can verify your current framing by taking a test shot, opening it in a basic digital photo editor with the ruler units set to millimeters, and drawing a line straight up from the bottom of the chin to the top of the skull. If that line falls outside the required millimeter window, adjust your zoom or crop tool immediately.
3. Position the Camera for Biometric Alignment
Framing relies entirely on the physical position of the camera relative to the subject. Biometric standards require a perfectly neutral, straight-on perspective. If the lens is tilted even slightly up or down, it distorts the apparent geometry of the face, artificially altering the recorded distance between the nose and the chin. This optical distortion is the primary reason home photographs fail compliance checks.
The lens must be positioned precisely at the subject's eye level. It must be perfectly parallel to the plane of the face. For infants, as detailed in an Australia baby passport photo guide, this means if they are lying flat on a white sheet, the camera must be suspended directly above them, pointing straight down. Photographing them at a 45-degree angle from their feet elongates the jaw and shrinks the forehead in the final image. The mechanics of lens distortion also dictate that shooting too close with a wide-angle smartphone lens will bloat the center of the face. This makes the nose appear wider and pushes the ears backward out of view.
To avoid this optical barrel distortion, step back at least 1.5 meters from the subject. Use the camera's optical zoom (typically 2x or 3x on modern mobile devices) to fill the frame. This longer focal length flattens the perspective. It preserves the true biometric distances of the face. You can act on this today by checking your physical camera setup: if you have to reach out and touch the subject while holding the camera, you are much too close.
4. Set the Correct Resolution for Print and Digital Files
A passport format photo submitted digitally has entirely different technical constraints than a physical print. While a printed photograph is measured in physical millimeters and ink dots per inch (DPI), a digital file is measured purely in pixels, and the density of those pixels determines whether the file is accepted or rejected by an online portal.
Government application portals enforce strict minimum and maximum file constraints, often requiring between 600x600 pixels and 827x1063 pixels. The critical failure mode here is image compression. Many applicants capture a high-resolution image, send it to themselves via a messaging application like WhatsApp, and inadvertently compress the file. The messaging platform strips the metadata and drastically reduces the pixel density, leaving an image that looks acceptable on a mobile screen but turns into a blurry, unusable mosaic when a border agency attempts to extract a 300 DPI print from it. This is a common barrier verified through a Singapore baby passport photo guide, where digital portal uploads must meet precise technical specifications.
The underlying mechanism is pixel mapping. Biometric algorithms require sharp, distinct pixel edges around the iris and the jawline. If the digital resolution is too low, those edges become soft, and the software cannot plot the necessary grid points. Check your file properties before submission. Right-click the image file on your computer, select properties or file info, and verify that the dimensions meet the minimum pixel count and that the file size falls within the acceptable kilobyte range, which is usually mandated between 50KB and 240KB.
5. Account for Minimum Margins and Bleed Areas
The empty space around the head is heavily regulated. You cannot simply crop the photo so that the top of the subject's head touches the upper boundary of the image. Every biometric standard requires a specific clearance zone, known technically as the crown margin, which sits between the top of the subject's hair and the physical edge of the photo paper.
For most international standards, as outlined in a Canada baby passport photo guide, this gap must be between 2 and 6 millimeters. If you fail to leave this gap, the automatic cropping tools used by passport agencies might slice off the top of the hair during processing. This immediately renders the document invalid. Similarly, there must be enough negative space at the bottom of the image to show the upper shoulders. This successfully anchors the face in space.
People routinely make the mistake of over-cropping to make the face as visible as possible, thereby eliminating this necessary negative space. The physical stamping process used on travel visas also strictly requires this blank background area so the consulate's physical seal does not obscure vital facial features. When setting up your final crop, deliberately map out a 4-millimeter buffer zone above the head. If you are using a digital layout tool, ensure your crop box extends above the highest point of the hair. A practical check is to look at the top edge of your drafted photo; if any part of the hair is physically touching the border line, you must pull the crop out to create the mandated breathing room.
6. Manage Background Contrast and Lighting Density
While dimensions and framing handle the geometric layout constraints, the background handles the visual extraction process. Biometric systems isolate the subject by detecting the sharp pixel contrast between the edge of the face or clothing and a perfectly uniform background. If that background contains gradients, heavy fabric textures, or deep cast shadows, the scanning software fails to draw a clean line around the subject.
The background must typically be a stark, uniform white or light gray. The underlying mechanism is simple: the computer algorithm looks for RGB color values that remain nearly identical across the entire empty space of the image. When a strong directional light creates a dark shadow directly behind the subject's neck, the software interprets that dark mass as part of the physical body, drastically altering the recorded shape of the shoulders and neck.
The most common lighting failure happens when applicants stand directly against a wall, allowing their body to block the room's ambient light and cast a hard shadow directly behind them, a frequent issue often noted in a New Zealand baby passport photo guide. The technical fix is to separate the subject from the background by at least half a meter. This allows ambient light to fall evenly behind them, erasing shadows entirely. You can test this today by turning off your camera's flash and relying purely on diffuse, indirect window light. If you see a hard gray outline directly behind the ears on your test shot, you must move the subject further away from the backdrop.
7. Account for Posture and Spinal Axis Alignment
Biometric compliance algorithms do not just measure the face; they measure the orientation of the face relative to the core body. The software assumes the camera is perfectly level and the subject is sitting or lying perfectly straight. If the subject's spine is tilted at an angle, the software calculates an artificial facial asymmetry. This structural requirement is why the upper shoulders must remain visible within the frame. The shoulders provide the horizontal baseline that allows the scanner to verify the vertical axis of the head.
A frequent failure occurs when subjects lean heavily to one side. The resulting image shows the head tilted toward one shoulder. Even if the photographer tilts the camera to compensate and make the head look visually straight, the uneven shoulders at the bottom of the frame will betray the rotation. The underlying measurement mechanism here is the calculation of the interpupillary line (the invisible line connecting the exact center of both eyes). That line must be perfectly parallel to the bottom edge of the photo and perfectly parallel to the shoulder line.
To prevent this, align the subject's torso straight on to the lens. If you are photographing an individual lying down, ensure their body is arranged in a straight vertical line before framing the shot. A practical test you can do right now is to look at a drafted photo and draw an imaginary line connecting the pupils, and another line across the shoulders. If those two lines are not parallel, the posture is misaligned and you must retake the photograph.
Common Pitfalls and Troubleshooting
The Image Is Rejected for "Poor Contrast" Despite Bright Lighting
Symptom: The photograph looks bright and clear to your eye, but the automated system flags it specifically for contrast issues or background non-uniformity. Diagnosis: This almost always happens when the subject wears a white or very pale shirt against a stark white background. The biometric scanner cannot differentiate where the shoulder ends and the background begins due to the identical RGB values. Fix: Change the subject into a dark, solid-colored shirt to create a hard, unmistakable visual boundary between the clothing and the white backdrop.
The Face Appears Distorted or Unnaturally Asymmetrical
Symptom: The nose looks unusually large, the ears are barely visible or pushed back, and the face appears much wider than in reality. Diagnosis: The camera was held too close to the face, utilizing the wide-angle characteristic of a standard smartphone lens. This introduces severe barrel distortion, wrapping the image outwards from the center. Fix: Move the camera back to a distance of 1.5 to 2 meters and use the 2x or 3x optical zoom to fill the frame. This physically flattens the perspective to match the true biometric proportions.
Digital File Upload Fails Immediately Due to Aspect Ratio Errors
Symptom: The online application portal returns an error stating "Invalid dimensions" immediately upon uploading the file, before it even attempts to analyze the facial features. Diagnosis: You uploaded a photo cropped to a European rectangular ratio into a system expecting a square 2x2 inch ratio, or vice versa. The outer bounding box of the digital file physically does not match the portal's strict pixel grid. Fix: Re-crop the original, unedited digital file to the exact pixel dimensions requested by that specific portal (for example, setting your crop tool to exactly 600x600 pixels).
Frame Obstruction Due to Eyewear or Reflections
Symptom: The application is rejected with an "obstruction" or "glare" error code, despite the eyes being wide open and clearly visible to the human eye. Diagnosis: Many jurisdictions have completely banned glasses in biometric photos, even if they are worn daily. The thick rims of the frames cast micro-shadows across the eye socket, or the glass lenses reflect ambient light, directly obscuring the precise geometric center of the pupil. Fix: Remove all eyewear entirely before taking the photograph. Ensure no stray hair falls across the eyebrows or the cheekbones, as these are critical landmarks for the algorithm. For parents handling this at home, manually measuring these baselines is often the breaking point. Dedicated digital compliance platforms suit those who need immediate algorithmic verification of these dimensions, whereas fully manual editing requires a strong grasp of millimeter conversions and aspect ratios.
FAQ
Do passport size parameters vary between adult and infant applications?
Generally, the external physical dimensions remain identical. A Schengen visa photo must be 35x45 millimeters regardless of the applicant's age. However, the internal biometric rules occasionally carry slight leniencies for infants under one year old regarding neutral expressions. Despite this, the strict head-size mapping rules, such as the 32 to 36 millimeter chin-to-crown measurement, universally apply to prevent scanning system errors.
How do I calculate the passport size correctly when printing at a local kiosk?
The safest technical method is to format your image as a 4x6 inch (10x15 centimeter) digital collage before taking it to a printing kiosk. By placing multiple correctly sized photos onto a standard 4x6 canvas in your photo editing software, you prevent the printing kiosk's software from automatically stretching or cropping a single image to fill the paper. When printed at exactly 4x6 without borders, the individual photos inside the collage will retain their exact millimeter dimensions.
What is the most common reason for a biometric photo rejection?
Incorrect head-to-image proportions cause the overwhelming majority of rejections. Even if the photograph is perfectly lit and the outer dimensions are cut precisely to the millimeter, the application will fail if the head itself only measures 25 millimeters tall inside that frame. Biometric scanners prioritize the internal facial landmarks over overall image quality.
Can I use the exact same photo file for both my digital application and my physical print?
You can use the same source capture, but it must be formatted and saved differently. A digital application requires a file optimized for screen viewing and specific upload constraints, usually resulting in a JPEG file around 150KB with exact pixel dimensions. A physical print requires a high-resolution, uncompressed 300 DPI version of that same crop to ensure the physical ink dots form a sharp, scannable image on the photo paper.