How to Use a Passport Photo Maker for Compliant Infant Photos
When an infant's passport application is rejected, the reason is almost never the paperwork. Consulates and border agencies reject infant photos primarily for biometric failures. An adult hand supporting a newborn's neck, an open mouth, or a shadow cast across the forehead triggers immediate rejection at the processing center. Traditional photo booths cannot accommodate infants safely, and professional studios require bookings that rarely align with a baby's unpredictable wake windows. Parents attempting this process at home often capture a technically sound picture, only to ruin it during the cropping phase. Knowing how to correctly configure and operate a passport photo maker eliminates this exact risk. This guide breaks down the mechanics of capturing, processing, and formatting an image that meets stringent government biometric standards without requiring professional lighting gear.
Quick Summary
Using a specialized application removes the guesswork from formatting biometric images, provided the initial capture supplies a clean, high-contrast file. The software maps facial features, automatically isolates the subject from the background, and scales the head dimensions to meet exact jurisdictional requirements. A successful outcome depends entirely on mastering flat lighting, securing neutral infant posture, and resisting the urge to manually crop the final file.
- Government biometric software relies on edge contrast; poor ambient lighting causes artificial cropping failures.
- Infants must be photographed lying down on a solid, neutral surface to prevent unintentional head tilt.
- Do not manually adjust the frame; the software automates the strict head-to-image ratio required by border agencies.
- Processing tools require uncompressed original files directly from the smartphone camera to accurately map facial geometry.
Table of Contents
- Quick Summary
- 1. Configuring Your Passport Photo Maker Workspace
- 2. Immobilizing the Infant Subject
- 3. Capturing the Raw Source File
- 4. Processing the Digital File
- 5. Exporting and Verifying the Output
- Common Pitfalls & Troubleshooting
- FAQ
- Recommended Reads
1. Configuring Your Passport Photo Maker Workspace
Shadows disrupt the automated facial mapping sequence
Before uploading anything into an application, the physical environment must be designed to eliminate shadows entirely. Processing software relies on distinct edge contrast to separate the subject from the background. When room lighting casts a shadow under the baby's chin or along one side of the nose, the application's algorithm interprets that darkness as a physical feature or a background element, leading to artificial clipping around the jawline.
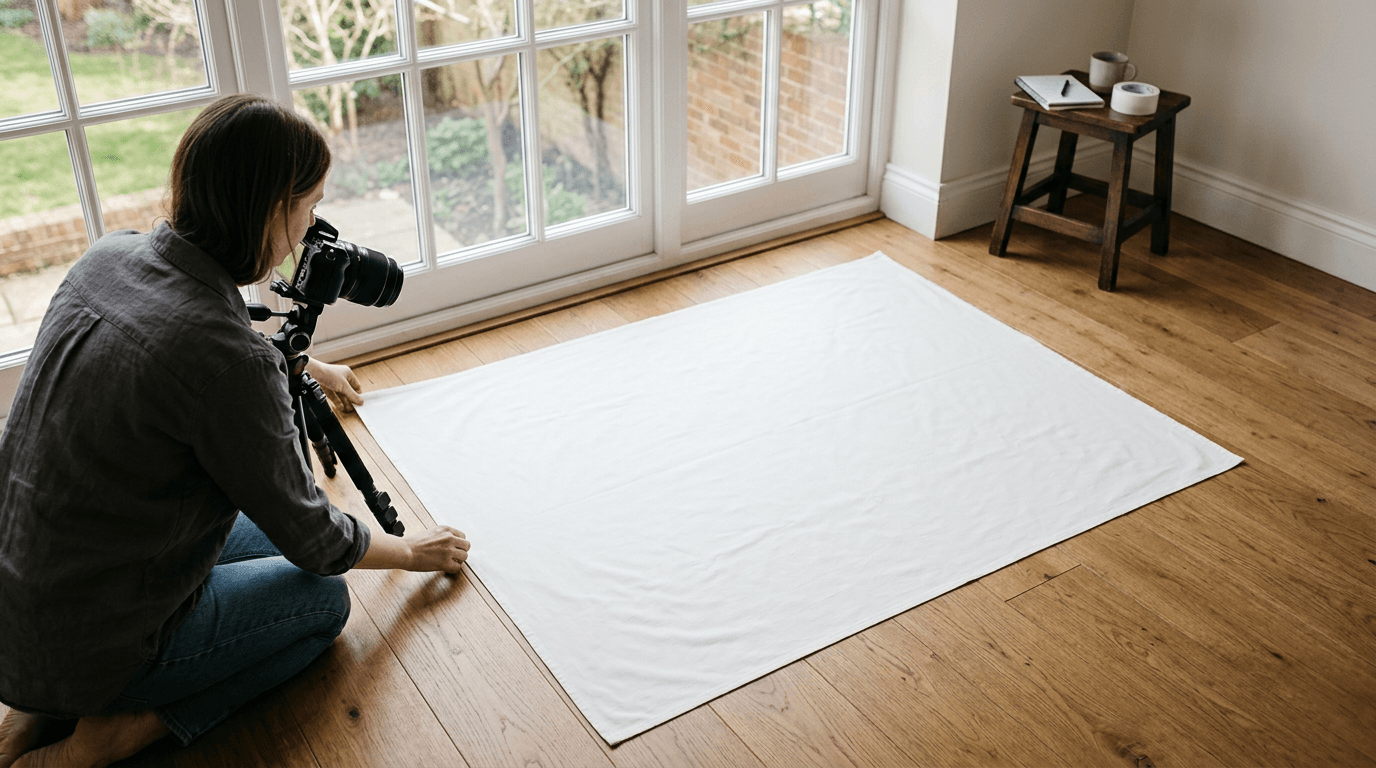
The failure mode here is relying on overhead residential lighting. Ceiling bulbs create harsh, downward angles that hollow out the eye sockets. Instead, move the setup entirely to a room with large windows. Wait for daylight, turn off all artificial lights, and place a plain white sheet or poster board flat on the floor directly facing the natural light source. The goal is flat, even illumination across the entire face. If you see a shadow on one side, place a white towel opposite the window to bounce ambient light back onto the darker cheek. You can verify this setup by placing your own hand where the baby's head will rest; if your knuckles cast sharp shadows on the sheet, the light is still too directional.
2. Immobilizing the Infant Subject

Gravity alters resting facial proportions without back support
Infants lack the cervical strength to hold their heads perfectly vertical. When parents attempt to sit a baby upright, the head inevitably tilts forward or slumps to the side. Biometric standards strictly dictate the vertical and horizontal centering of the face, meaning any tilt invalidates the passport format photo immediately. The mechanics of a compliant image require the camera sensor to be perfectly parallel to the subject's facial plane.
The common mistake is trying to support the baby's head with a hand hidden behind their neck. The fingers almost always protrude past the ears, or the resulting posture looks unnatural and strained. The fix is to use gravity as an asset rather than fighting it. Lay the infant flat on their back on the prepared white surface. Roll two small towels tightly and tuck them beneath the white sheet on either side of the baby's head. This creates a subtle cradle that physically prevents the head from rolling sideways without any adult hands entering the frame. Check the alignment by drawing an imaginary line from the baby's nose to their navel; if that line is not straight, adjust the torso before adjusting the head. Reviewing comprehensive EU and international baby passport photo requirements demonstrates why this alignment is mandatory.
3. Capturing the Raw Source File
Burst mode circumvents the infant blink reflex
The photographer holds the camera above the baby. Capturing a neutral expression becomes the primary challenge. Both eyes must be open. Biometric scanners map the exact distance between the pupils. This makes a closed or half-closed eye a fatal error. Modern smartphone cameras often introduce a slight shutter lag. The moment you see eyes open on the screen is not the exact millisecond the frame is recorded.
Parents routinely fail at this step by taking individual photos, waiting for the perfect expression, tapping the screen, and capturing the blink that immediately follows. The infant becomes agitated before a single usable shot is secured. The correct approach is to hover the smartphone exactly parallel to the floor, directly over the infant's face, and hold down the shutter button to activate burst mode. Use a rattle or a highly contrasting toy held right next to the camera lens to draw the baby's gaze upward. Keep the device far enough back to include the shoulders and plenty of empty space above the head. For specific national rules, such as those detailed in a standard Germany baby passport photo guide, the eyes must be looking squarely at the lens.
Practical rule: Frame the shot loosely; leave at least two feet of visible background around the infant's head to give the processing software room to map and crop.
4. Processing the Digital File
Manual cropping destroys the embedded biometric scale
Once a raw file is captured, it must be processed to meet exact physical dimensions and background requirements. A digital passport photo requires a pure white or light grey background, depending on the jurisdiction, and the head must occupy a precise percentage of the total image area. The processing software maps the distance from the chin to the crown of the head, automatically calculating the ratios required by the destination country's government.
The most frequent mistake users make is pre-cropping the photo on their phone before uploading it to the platform. Smartphone cropping tools alter the native resolution and aspect ratio. When a pre-cropped image is uploaded, the software's automated sizing algorithm loses its reference points, resulting in a head size that will print too large or too small. The fix is to upload the original, untouched file directly from the camera roll. The platform will automatically execute the background removal protocol, detect the crown and chin, and apply the correct jurisdictional dimensions. You can verify the software's accuracy by checking that both ears (or the edges of the face) sit exactly equidistant from the left and right margins of the preview window. Since this file contains sensitive facial geometry, verifying the platform's privacy policy ensures the image is deleted from servers after processing.
5. Exporting and Verifying the Output
Format conversions degrade required edge sharpness
The final phase involves downloading the processed file and preparing it for printing or digital submission. A compliant image must maintain a minimum resolution of 300 dots per inch (DPI) to ensure the printed result is crisp enough for physical scanning at a border checkpoint. The software outputs a finalized template that contains the exact passport picture size required, often arrayed on a standard 4x6 inch sheet for easy local printing.
Users often ruin a perfectly processed file by sending it to themselves via Facebook Messenger or other messaging apps before printing. These platforms automatically compress image files to save bandwidth, drastically reducing the DPI and introducing pixelation around the eyes and mouth. A compressed file will print muddy, causing a biometric failure at the final hurdle. Always download the finalized image directly to the device you will use for printing, or transfer it via email using the Original File setting. Before submitting the application, take a physical ruler to the printed copy and measure the head from chin to crown; it must align precisely with the jurisdictional limits shown on the final output. As an example, checking a United States baby passport photo guide shows the head must measure precisely between 1 and 1 3/8 inches.
Common Pitfalls & Troubleshooting
The visible symptom of a failed biometric image often looks identical across several root causes. A government rejection notice will typically state "facial features unclear" or "background non-compliant," leaving you to guess the actual mechanical failure. Here are the distinct errors that trigger these rejections and how to fix them.
Artificial jawline clipping
Symptom: The infant's jawline looks jagged, or a piece of the cheek appears missing in the final processed file. Fix: This is caused by shadows mimicking background elements, confusing the automated background removal tool. The solution is not to use a different software, but to retake the source photo with flatter, more direct lighting. Move the subject closer to the window and ensure no objects are blocking the ambient light.
Unnatural skin tones or color casts
Symptom: The baby's skin looks heavily yellow, blue, or overly red after processing. Fix: This happens when mixed lighting (e.g., a warm incandescent ceiling bulb mixing with cool daylight from a window) confuses the camera's white balance sensor. Turn off every artificial light in the room before capturing the raw image. Rely solely on daylight to ensure the skin tones register accurately.
Biometric mapping failure
Symptom: The platform throws an error stating it cannot detect the eyes or chin, even though they are clearly visible to a human. Fix: The most frequent cause is the baby's mouth being wide open, which drastically alters the distance from the nose to the chin, breaking the algorithm's expected facial geometry. Wait for the infant to calm down, close their mouth, and try again. Using a pacifier until the exact moment of capture can help secure a neutral, closed-mouth resting face. Reviewing a platform's 100% refund policy can provide reassurance if you are concerned about persistent biometric rejections.
FAQ
Can I use a flash to eliminate shadows on the baby's face?
No. Using a direct smartphone flash causes harsh red-eye effects and creates a severe, localized glare on the infant's forehead or cheeks. Government guidelines strictly forbid flash bounce on the skin, as it obscures the true texture and tone of the face and creates unnatural highlights. Furthermore, the flash casts a sharp drop-shadow on the white background directly behind the baby, which processing algorithms cannot separate from the subject. Always use flat, indirect natural daylight instead.
What if the baby's eyes are slightly off-center?
If the head is tilted, the photo must be retaken. However, if the head is perfectly straight but the baby's eyes are looking slightly away from the lens, infants under six months often receive slight leniency from some jurisdictions. Despite this leniency, it is highly recommended to use a toy right beside the lens to capture direct eye contact, as this is the safest route to guaranteed compliance.
Why does the software need me to leave space around the baby's head?
The automated sizing tool maps the head and then centers it mathematically within a predetermined canvas size. If the source image is cropped too tightly during capture, the algorithm has no surrounding pixels to pull into the final frame, resulting in an uncorrectable zoom effect that violates scale requirements. Leaving at least two feet of plain white background around the subject provides the software with the raw pixel data it needs to shift the axis, correct slight torso misalignments, and render the final layout.
Do I need to remove my infant's glasses or headband?
Yes. All headwear, pacifiers, large hair bows, and glasses must be completely removed. Anything that obscures the hairline, casts a shadow on the face, or changes the silhouette of the head will result in an immediate rejection by border agencies.